EDIT:
There’s now a super simple Netlify plugin for this. This post is now outdated and retired!
As a JavaScript developer, I have been jealous of the functionality that Wordpress provides content authors in terms being able to preview content before publishing.
I have worked on sites with Contentful (headless CMS) where preview is possible, but only after rebuilding the site. Whilst this is workable, it’s not ideal from a content authoring point of view as you.
This article will outline what Contentful, NextJS and Netlify are and then provide an example of how I implemented preview mode using this stack. The end result is you will have a JAM Stack site that also allows you to preview content from your CMS without having to firstly publish the page.
Contentful => NextJS => Netlify
Contentful
Contentful is my favourite of the headless CMS’ available. I have tried a number of them, but Contentful’s stands out to me because:
- It provides Webhooks that allow you to configure the webhook request body. I used this feature to trigger builds in Azure Devops repos where this is not ‘officially’ supported.
- The fields it provides are very flexible and plentiful. My favourites are the location field which provides a drag and drop pin for locations and unique fields such as slugs.
NextJS
NextJS is a JavaScript framework that uses React for building out your UI. I love NextJS because:
- It supports static site generation and server side rendering
- It provides API routes (or serverless functions) ‘out of the box’
- Typescript support
- Simple integration with Netlify
Netlify
Netlify is a fantastic host for your JAM stack projects. I love it becuase:
- It deploys serverless functions to AWS Lambda on your behalf
- It’s very easy to create new staging environments using Deploy Contexts. For example you can change the deploy context to build a certain branch in your repo so you can test features before merging.
- It provides webhooks to enable continuous integration of code merges or content updates.
Enabling Content Preview from Contentful
Create your Serverless Function
NextJS offers the ability to enable Preview Mode. This is enabled by creating a serverless function within your API routes that sets some specific cookies that allow you to query your data from Contentful for draft content, rather than published content.
The below borrows a lot from the NextJS docs, but implements the switch statement to redirect to the page you need based on the slug.
import { getPreviewPostBySlug } from "../../lib/api"

export default async function preview(req, res) {
  const { secret, slug, type } = req.query

  if (secret !== process.env.CONTENTFUL_PREVIEW_SECRET || !slug) {
    return res.status(401).json({ message: "Invalid token" })
  }

  // Fetch the headless CMS to check if the provided `slug` exists
  const post = await getPreviewPostBySlug(slug, type)

  // If the slug doesn't exist prevent preview mode from being enabled
  if (!post) {
    return res.status(401).json({ message: "Invalid slug" })
  }

  // Enable Preview Mode by setting the cookies
  res.setPreviewData({})

  // Set the URL to redirect to
  let url
  switch (type) {
    case "post":
      url = `/posts/${slug}`
      break
    case "pageLayout":
      url = `/${slug}`
      break
    case "homePageLayout":
      url = "/"
      break
    default:
      url = `/`
  }

  // Redirect to the path from the fetched post
  // We don't redirect to req.query.slug as that might lead to open redirect vulnerabilities
  // res.writeHead(307, { Location: `/posts/${post.slug}` })
  res.write(
    `<!DOCTYPE html><html><head><meta http-equiv="Refresh" content="0; url=${url}" />
    <script>window.location.href = '${url}'</script>
    </head>`
  )
  res.end()
}
So the steps are as follows:
- Incoming URL to the function has query params
secret,slugandtype. More on these later. - Firstly, check that the
secretfrom the request matches that of your local variable. - Using the
slugandtypeensure the content you’re trying to preview exists. If it does, then set the appropriate cookies - In the switch statement, change the url route we’re going to redirect to based on the
type. In this case for apostcontent type, we know we need to redirect to thepost/${slug}route. - Redirect the user to the route in the
urlvariable.
As an FYI, my directory for the project looks like this, where routes will be something like /post/my-post:
+-- _config.yml
+-- pages
|   index.js
|   [id].js
+-- api
|   +-- preview.js
|   +-- exit-preview.js
+-- posts
|   +-- [id].js
+-- utils
|   +-- api.js
Install the next-on-netlify package
As of 27 Oct 2020, Netlify announced that they now officially support preview mode. Install the package as per the isntructions in their blog guide and deploy to Netlify.
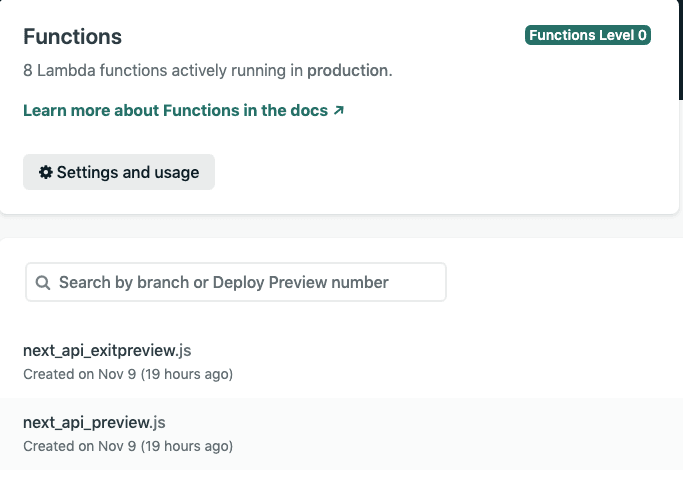
Netlify functions are created!
The next-on-netlify plugin allows you to now use your API routes as though you had deployed your Next app to Vercel. Netlify will fetch the functions your have created within your Apis directory and deploy them in much the same way you would expect if you were to place the functions within a functions directory as you would traditionally do with Netlify.
We can now access the api route via:
https://your-project-domain.netlify.app/.netlify/functions/next_api_previewAccessing this api route within the proper query params will throw an error.
Set up Contentful to view preview data
Login to your Contentful space and go to the Content Preview section:

Within this section you can now set which content types you would like to add the preview mode to.
You will enter your next_api_preview serverless function with the parameters as below. Note that your content types must have
a unique field called slug for this to work:
https://your-domain/.netlify/functions/next_api_preview?secret=your-secret&slug={entry.fields.slug}&type={entry.sys.contentType.sys.id}Then, within an entry for your content type, you can click on the ‘Open Preview’ button. This will take you to your app,
hit your serverless function, and then redirect you to the slug you entered. The switch statement in the function will take care of
which route to specifically take you to with the URL placeholders, e.g. {entry.fields.slug} replaced with the content from the CMS.

You should see two cookies set:
__next_preview_data__prerender_bypass
Set up your app to detect preview mode
Within your api.js in the utils directory, set up your preview client as below. Also create a function (getClient) this that allows you
to switch between preview and published from Contentful. (note the host)
const space = process.env.NEXT_PUBLIC_CONTENTFUL_SPACE_ID
const accessToken = process.env.NEXT_PUBLIC_CONTENTFUL_ACCESS_TOKEN

const client = require("contentful").createClient({
  space: space,
  accessToken: accessToken,
})

const previewClient = require("contentful").createClient({
  space: process.env.NEXT_PUBLIC_CONTENTFUL_SPACE_ID,
  accessToken: process.env.CONTENTFUL_PREVIEW_ACCESS_TOKEN,
  host: "preview.contentful.com",
})

const getClient = preview => (preview ? previewClient : client)
Set up your function to retrieve data from Contentful. in this case
we’re querying for Post data (Post content model). Note the getClient function
which will determine whether to query published or preview content.
export async function getPostData(slug, isPreview) {
  const entries = await getClient(isPreview).getEntries({
    content_type: "post",
    limit: 1,
    "fields.slug[in]": slug,
  })
  return entries
}
In the below example, within the file: pages/posts/[id].js
We have have the getStaticProps function which is now having the
preview passed in. This is a boolean value. We can pass this to our
getPostData from the api.js file.
export const getStaticProps = async ({ params, preview }) => {
  // Fetch necessary data for the blog post using params.id
  const postData = await getPostData(params.id, preview)

  return {
    props: {
      postData: postData.items[0],
    },
  }
}
The Contentful query in getPostData will now return the latest unpublished
version of the content.
Closing thoughts
Implement the same check for preview mode for each of your routes so that you can browse the entire site in preview mode.
To exit preview mode, hit the endpoint:
https://your-domain/.netlify/functions/next_api_exit-previewThis will clear the cookies. See the NextJS doc on this.